In this post, we’re introducing ngrok, a very useful tool that has saved us a lot of time when we were prototyping and developing chatbots.
Why ngrok is so useful for chatbots
To communicate with APIs like Facebook Messenger, you need to create a webhook. This webhook is triggered by an event. For example, if a user sends a message to your Facebook page, the Facebook Messenger API sends a POST request to your webhook.
When prototyping, you’re most probably running your code on your local computer (localhost). The problem is that Facebook can’t access your webhook there. To circumvent this, you would need to upload your code to a web server all the time. This is a tedious task when you’re just playing around!
This is where ngrok is helpful: it’s a tunneling package that makes your localhost accessible online. This way, you can still prototype on your local computer, while the webhook is working.
What you’ll learn in this post
- How to install ngrok on your computer
- How to make it work for your localhost
- Other useful tips and resources
You can also find a video tutorial here:
This video is part of our course on “Chatbot Development for Facebook Messenger.”
Get 47% off
How to install ngrok
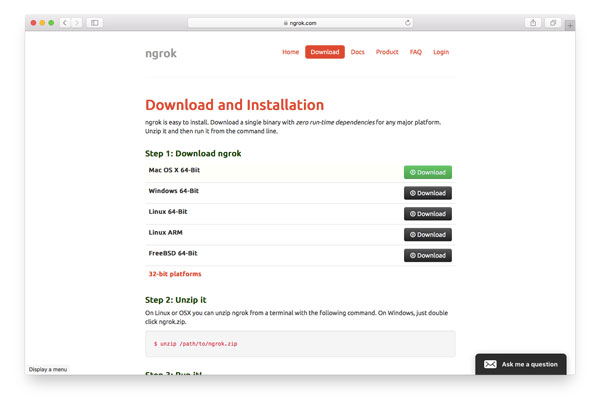
ngrok offers very easy steps for installation. For Mac and Linux, it’s as simple as downloading and unzipping it. If you’re a Windows user, the people at Twilio offer a great tutorial for setting it up.

When it’s in your path, you can run (and get helpful information) with the following command:
$ ./ngrok help
Here’s how it looks like on my Mac:
NAME:

   ngrok - tunnel local ports to public URLs and inspect traffic

DESCRIPTION:

    ngrok exposes local networked services behinds NATs and firewalls to the

    public internet over a secure tunnel. Share local websites, build/test

    webhook consumers and self-host personal services.

    Detailed help for each command is available with 'ngrok help <command>'.

    Open http://localhost:4040 for ngrok's web interface to inspect traffic.

EXAMPLES:

    ngrok http 80                    # secure public URL for port 80 web server

    ngrok http -subdomain=baz 8080   # port 8080 available at baz.ngrok.io

    ngrok http foo.dev:80            # tunnel to host:port instead of localhost

    ngrok tcp 22                     # tunnel arbitrary TCP traffic to port 22

    ngrok tls -hostname=foo.com 443  # TLS traffic for foo.com to port 443

    ngrok start foo bar baz          # start tunnels from the configuration file

VERSION:

   2.1.18

AUTHOR:

  inconshreveable - <alan@ngrok.com>

COMMANDS:

   authtoken                         save authtoken to configuration file

   credits                           prints author and licensing information

   http                              start an HTTP tunnel

   start                             start tunnels by name from the configuration file

   tcp                               start a TCP tunnel

   tls                               start a TLS tunnel

   update                            update ngrok to the latest version

   version                           print the version string

   help                              Shows a list of commands or help for one command
How to run ngrok from any folder
When ngrok is not available in your path, you can create a symlink. As described in this simple tutorial, just unzip it into your Applications folder, open your Terminal, and enter the following two commands:
# cd into your local bin directory
cd /usr/local/bin

# create symlink
ln -s /Applications/ngrok ngrok
Great! Now you should be able to run ngrok from any folder in your Terminal!
Run it and tunnel into your localhost
If you look at the help output above, you can run ngrok by using the following command:
ngrok http 80 # secure public URL for port 80 web server
For example, I have my Laravel projects running on localhost port 8000, so to make it work, I use 8000 instead of 80 in the example above. This is how the result looks like:

Localhost and SSL
Notice that it’s forwarding to http and https? That’s really helpful, as e.g. the Facebook Messenger API needs secure webhook links.
Link to your webhook
Now open the Messsenger app and link to your webhook. In my case it would be
https://eca4eb79.ngrok.io/webhook
That’s it! Now it works until you’re terminating ngrok in your terminal.
Other useful tips
Twilio offers one more really helpful post that offers even more tips and resources: 6 awesome reasons to use ngrok when testing webhooks
Any questions?
Please let us know in the comments!
Header photo by Vladimir Kramer. Thank you!
